9/30/15

BIG/Voluminous Braid How-To!


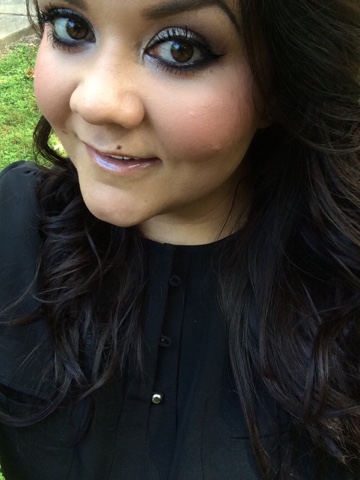
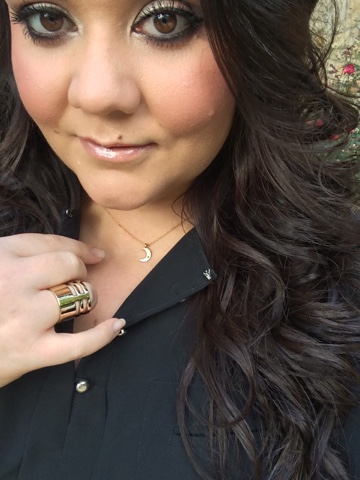
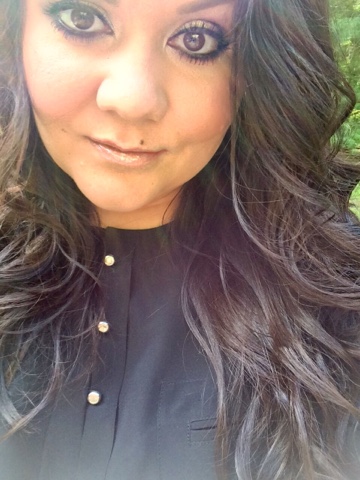
Hey guys!  Today I thought I would share how I get the most volume out of my braids.  I am not a big fan of itty-bitty tight braids, to me it's the bigger the better.  And while I do have a ton of hair, just like everybody else, when you tightly braid my hair it's little.  Here are some tips and tricks for getting the biggest braids possible.

In this particular look I added a little bit of pink hair to braid in since it matched my shirt and makeup.  This 1" extension is the ONLY hair extension I own!  I bought it from Sephora a couple of years ago (along with a purple one I have since passed on to my niece), and it's real hair that can be heat styled or whatever.  Fun to clip in for the day for a pop of color, then pop out at night and have just my hair.  If you have a colored extension I will show you how to use it in this post, otherwise, you don't need any other fake hair or anything like that.  Just use what you've got!

On this day I started out with freshly washed, air dried hair that I had curled slightly with a large curling iron.
#clawhand

I let my hair part where it wants to, or you could part your hair where you prefer.

Select what hair you want to go in your braid.  I chose a section an inch or so away from the front of my hair, approximately a 2" by 2" section, as I am just doing a partial braid to wrap around one side of my head today.

If you're using a colored extension just clip it in underneath your section of hair...

And then pull everything up together and start to do just a basic braid.

The key is going to be only braiding 4 or 5 passes and then stopping to work on that section before braiding down any further.  We are going to create volume in the braid by lightly pulling on each loop of the braid.  If you braid the whole thing and then start trying to pull on it it's just way too hard and it's hard to keep things even.


As you can see, I braided the 4 or 5 passes and have started pulling on each loop of the braid to make it bigger and more full.  I would have photographed me pulling on the loops, but I ran out of hands, lol.  


After you 'fluff' one section then continue braiding down 4 or 5 passes, stop and pull, and so on.  In this photo you can see the top of the braid is much more full, and the bottom few passes are still tight.  It really makes a difference in the size of your braid!

Here is what my braid looks like once I have it about as long as I need it.  To really secure things I would recommend using a small, clear elastic at the end of the braid, then bobby pinning into place.  I just did this braid for the tutorial, so I simply pinned it on the backside of my head with a couple of bobby pins.  I like to pin it underneath a section of hair so that the braid kind of disappears at the end, and you don't see the pins.

This technique can be used for a basic side braid, a crown braid, or for something similar like I did here.  For this look I kept everything else just wild and flowy, letting the front sections of hair I kept out of the braid kind of frame the face.


Hope this helps give you some inspiration for your braids!  If you have any questions just let me know!

9/27/15

CatGenie 120 Self-Flushing Litterbox Review!

Hey guys!  We recently just made one of the BEST purchases of life, and I had to come on here and share it with you guys.  If you have cats then you definitely need to read this, as it is completely life-changing!   The item I am referring to is the CatGenie 120 Self-Flushing Litterbox.


This thing is pretty heavy and the packaging is pretty substantial.  Very nicely done.


This is everything out of the box.  You get a detailed instruction booklet on how to do every thing you need to.  There are 5 basic steps you have to do, start to finish, to get it up and running.


Step 1 is just unpacking and checking to make sure you got everything.


Step 2 is basic assembly of the unit.  This took less than 2 minutes, you literally sit the motor on top of the bowl and attach the GenieArm (scoop-thingy).


You will do either Step 3 OR Step 4, it just depends on where you want the litterbox to go.  I chose to put the CatGenie in my laundry room, so I did Step 3.


Step 4 is if you choose to install it in the bathroom.


Step 5 consists of pouring the granules (their version of litter) into the bowl, popping in the sani-solution cartridge, plugging it in and running the first cleaning cycle.


Installation is basically complete at Step 5, in Step 6 it just shows you how to encourage your kitties to use the new box and recommendations for the various settings it has.


You get a lot of other useful information with the box.


As I said above, there are several different settings for the CatGenie.  One box can do up to 4 cats, which is what we currently have.  You can set the box to sleep at night or run 24 hours a day, and you can customize it to clean at a set schedule or by cat activation.  If you set the cleaning setting to cat activation you get 240 washes out of the sani-solution cleaning cartridge.  If you put the box on manual or a timed setting, you only get 120 washes out of it.  For reference, mine is set on #4 + CAT activation and it works perfectly for my 4 cats.  To put it simply, on this setting the CatGenie will do a cleaning cycle 30 minutes after one of my cats uses it and it only cleans if a cat actually uses it (it has sensors to detect a kitty).  On this setting it does not just automatically clean on a timed schedule, it only cleans if a kitty has been in it.


The hardest part about the installation was obviously hooking everything up in my laundry room.  This would probably take someone who was fairly familiar with pipes and laundry room hookups about 10 minutes to do, but where I am not it took me closer to 30 minutes.  The longest part for me was just getting the washer pipes unscrewed, I am horrible with a wrench.  (I think the Incredible Hulk screwed these on last).  But anyways, here is what it looks like once everything is hooked up.  I will try to show you in a series of pics what everything is.


So, as you will find in every house in the laundry room, you have power outlets for your washer (basic 110 outlet) and dryer (220 outlet), a hot water spout and a cold water spout, and a drain tube your washer empties out of.


As you can see, I plugged the CatGenie in the regular 110 outlet above my washer.  You get a T-Adaptor with your CatGenie that you attach to your COLD water spout (I called it a 'dohickey' in the above photo).  You just turn the water off to that spout by twisting the knob, unscrew the washer hose, screw in the T-Adaptor, and instead of having one nozzle you now have two (one for your washer, one for the CatGenie).

(the dohickeys that come with the CatGenie.  I used the top one).


So, once the T-Adaptor is screwed on you can see the two hoses attached.


The CatGenie comes with the water hose and drainpipe already attached to it, and with the drainpipe you just slide it in the drain hole alongside your washer's drainpipe.


Make sure everything is connected securely so you don't have any leaks and you are done!

(The CatGenie in the middle of a wash cycle)

Some things to keep in mind:
-It takes about 17 minutes for the CatGenie to complete a wash cycle.  The GenieArm (scoop thingy) does 3 scoops, then there are 3 wash cycles, and lastly there is a drying session where the granules and the scoop and bowl are all completely dried and ready for the next use.  
-The way that it works is it uses the water to break up the cat waste, so that no solid waste is emptied through the drainpipe, it is all a liquid waste that has been completely broken down.
-You NEVER replace the granules, they are washed and dried and there is never a need to replace them.  But, you do lose some during the cleaning process and with cats kicking them out of the box, tracking them out on their feet, etc.  So, over time you have to add a little here and there.  There is a line on the bowl that you use as an indicator to see where the fill line is.  They stress not overfilling the bowl!
-You have to clean the CatGenie's Water Sensor Guide every 4 months, but the box alerts you when it's time to do it.  You can do this manually or automatically and it only takes seconds.


Here is a super short clip of it working...


We did order the dome to go on top of the bowl to both give our cats some privacy and in an effort to keep from losing any granules.  It shipped separately from the CatGenie and it will not arrive until tomorrow, but hopefully we will like it.  Here is a list of everything you are going to have to buy, including the CatGenie itself and everything you'll have to have to keep it going, in case you are interested in owning one yourself.


I hope I explained everything enough!  If you have any questions just let me know!  Litterboxes have to be one of the grossest things in this world, and this product has made all of that go away!  My kitties always have a clean box now, and I don't ever have to fool with cleaning it.  Whoever made this is a GENIUS.  Anyways, thanks for stopping by and have a great Sunday!!!
post signature

9/25/15

Fall 2015 LOTD: Bronze & Black

Hey guys!  Today I thought I would share with you a Fall look of the day.  Fall is just starting, and it has still been pretty warm here in Kentucky.  Last week we averaged between 75-80 degrees, and seeing as how I am a hot-natured person, I haven't been ready to start bundling just yet.  Here is everything I used for this warm Fall day!


I think the color combination of black and gold is just stunning.  I paired a black blouse with gold buttons along with my Wren 14t gold moon necklace that is adorned with a little black sapphire.  (The necklace came in my Summer 2015 FFFVIP box).  The gold ring I am wearing is from H&M.


Again, where it has been kind of warm here I wore a pair of black leather sandals that has gold studs and hardware (Michael Kors), with a simple pair of skinny jeans (American Eagle).


Watch and bracelets:  Kate Spade and Alex and Ani.


For the face I kept it pretty simple with just a CC cream that I set with some powder, a little bronzer to warm my face up, and a matte peach blush.
It Cosmetics CC+ Cream
Rimmel Stay Matte Powder
Nars Laguna Bronzer
MAC Peaches Blush


For the eyes I just did a neutral bronze-y look with cat eye eyeliner and some really black mascara.  Natural lashes, as always.
Too Faced Semi-Sweet Chocolate Bar Palette
Anastasia Brow Wiz and Clear Brow Gel
Kat Von D Tattoo Liner in Trooper
Guerlain Maxi So Lash Mascara 


On the lips:
MAC High Tea Lipstick
MAC Bared For You Lipglass


Thank you for stopping by!  Have a great weekend!
#YAYforFall
post signature

9/24/15

Pretty Makeup: Physician's Formula City Glow Bronzer In Paris

....sometimes makeup is just too pretty to use!


This is the first (and only) time I ever bought makeup with the intention of never using it, lol.  Normally that sort of thing sounds so silly to me, but seeing as how this is SO pretty and where it was super affordable, I didn't really mind.


So pretty!  I am thinking about picking up a 2nd one so that I can actually use it, lol.
Have you ever bought a makeup that was too pretty to use?
post signature